Welcome back!
I hope you guys enjoyed last week's in-depth look at what a portrait session with me is like. I know it can be intimidating to book a session sometimes especially when you don't feel comfortable in front of a camera or don't have a lot of experience being the main and only subject in your photos. This week I want to give you some guidelines and advice when it comes to planning your ideal session, and some ways you can prepare yourself to feel your best on the day of your session! Since I want you to be able to interpret my advice in a way that works for you, I decided to create questions you can ask yourself instead of giving you direct pieces of advice. This way you can frame and direct yourself in a way that works for you. Let's get started!
1.What is the purpose of your session?
When you're planning for a session you have to know what the end goal and the reason for your session is. If it's a branding or headshot session - think about your brand or yourself and what you want these images to convey, think about what you can include in your photos to help convey the right message. If it's for a birthday or a celebration - think about what colors or themes you can use to build an outfit. When you know what exactly you want the photos to represent, it will help you put together an ideal color palette or style for your photos.
2.What styles make you feel the most confident?
The first thing about styling is deciding the theme of your style, your aesthetic, and which one gives you the most confident. One of the best ways to decide this is to build different styles and evaluate how you feel in them, and what you want to change. I always start with 1-3 completely different look or themes, and I try them on and then I start playing around with pieces until I have my ideal outfit. If you're not confident on building more than one look, just start with one and modify accordingly. Put together a full business professional or a going out look from head to toe - identify what about the style you like and what you don't. It could be anything from liking the shape of the style, or liking a specific piece of clothing. When you've identified what you like and makes you feel good, you can modify the outfit or style.

Look at my client's arms here - her arms are creating triangles and it helps to create dimension in her pose. The angles line up with her natural curves and emphasizes the shape of her figure in a really flattering way.

This one is a little more subtle but make use of your outfit! We used the simple action of putting her hand in her pocket to create a triangle with the arm and it helps enhance her silhouette despite her wearing a blazer.
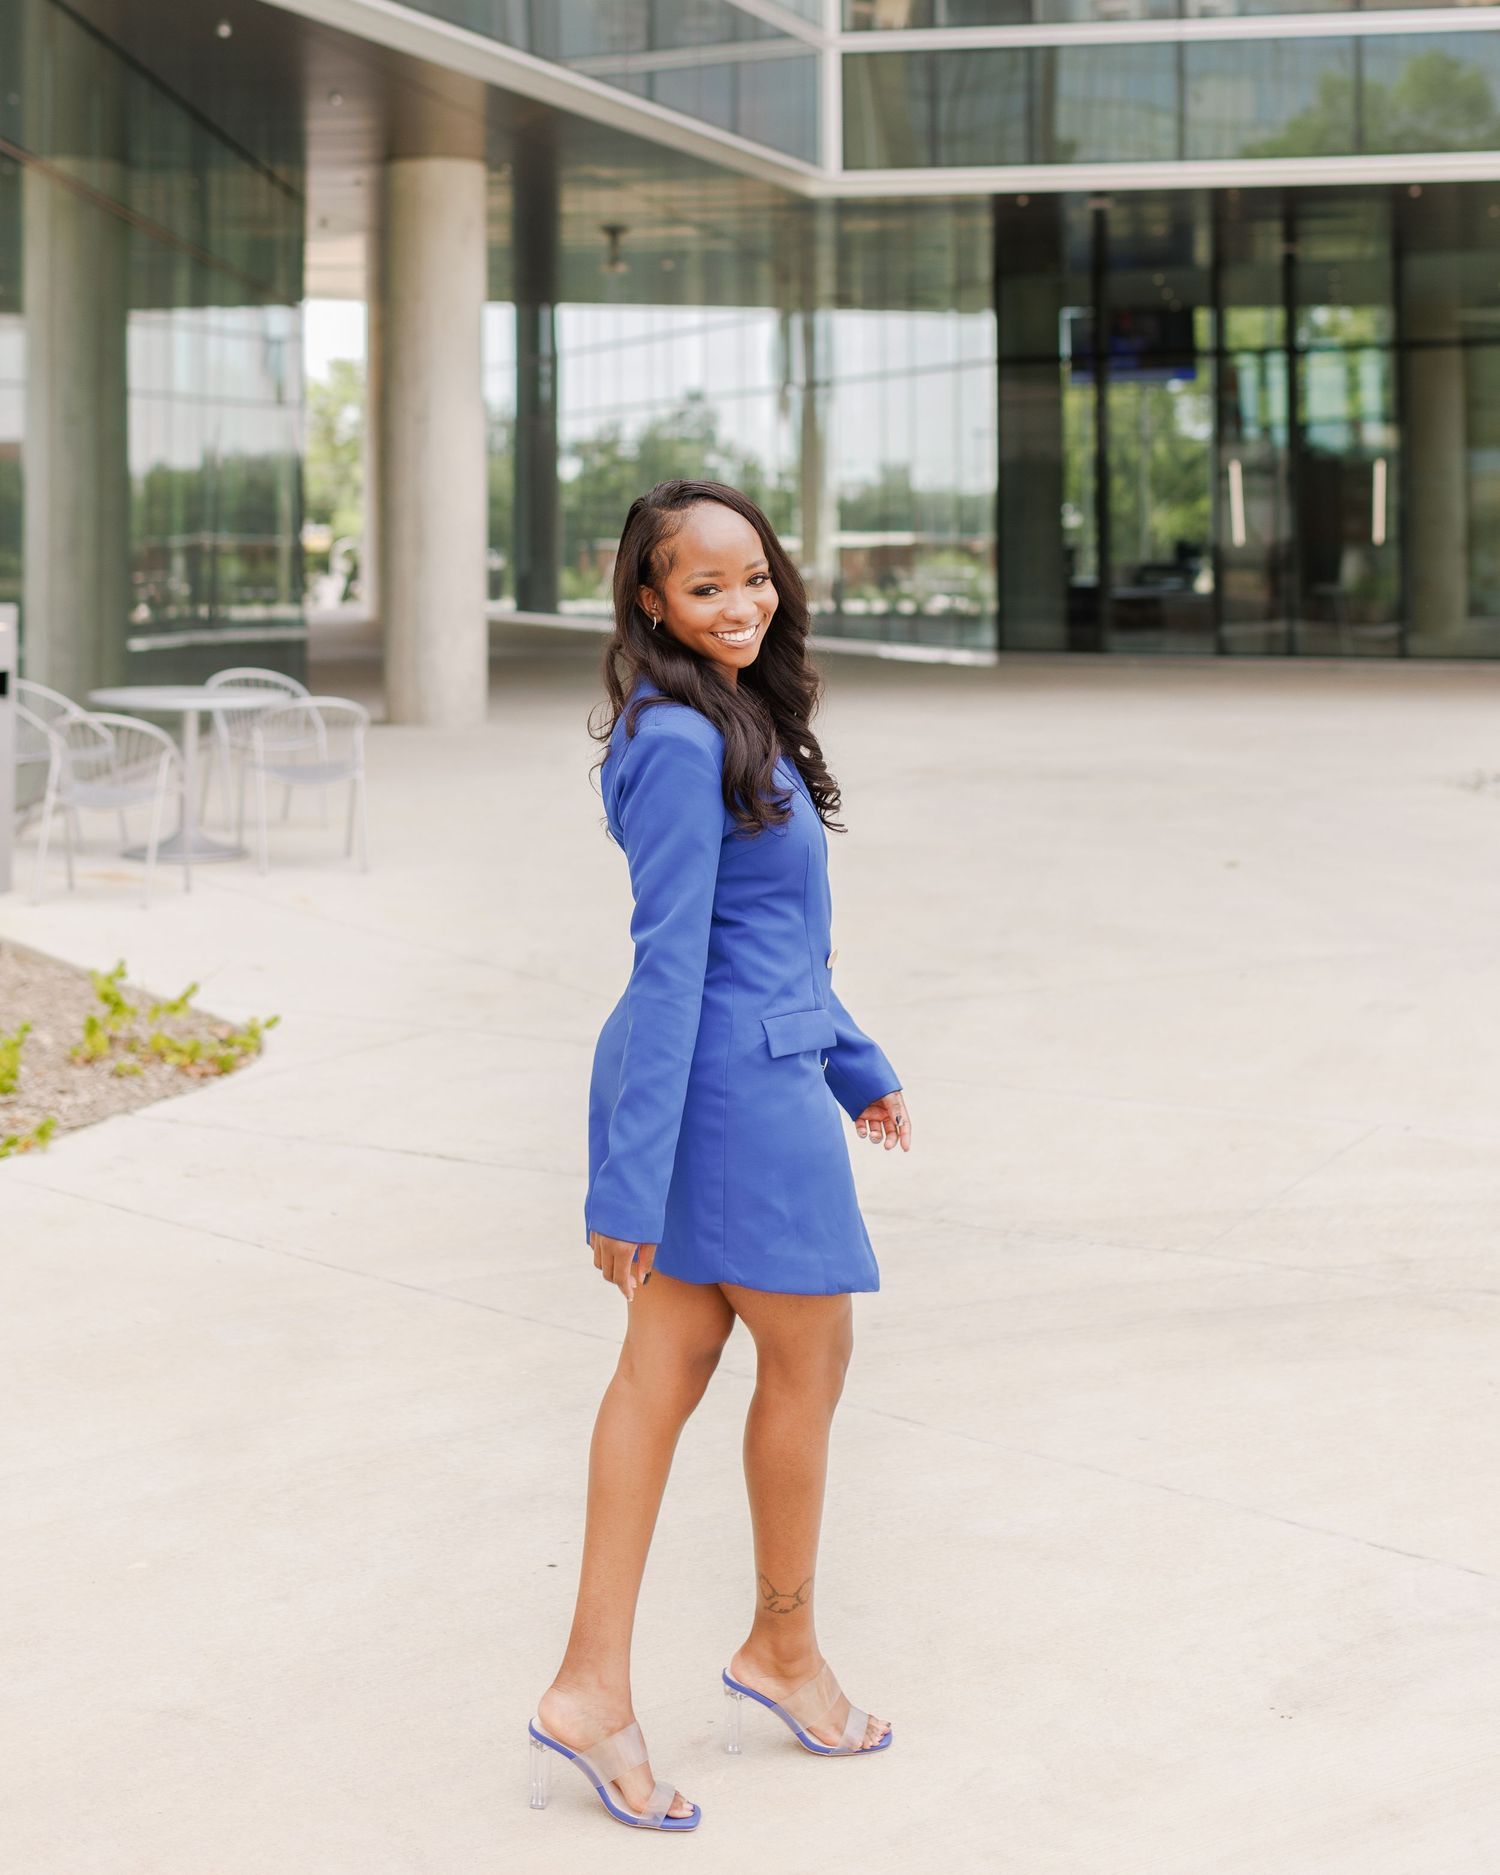
My client wore a blazer dress here and I wanted to emphasize her figure and her curves! This prompt is one I use a lot and it helps to show off your figure in a really flattering way whilst still keeping movement.
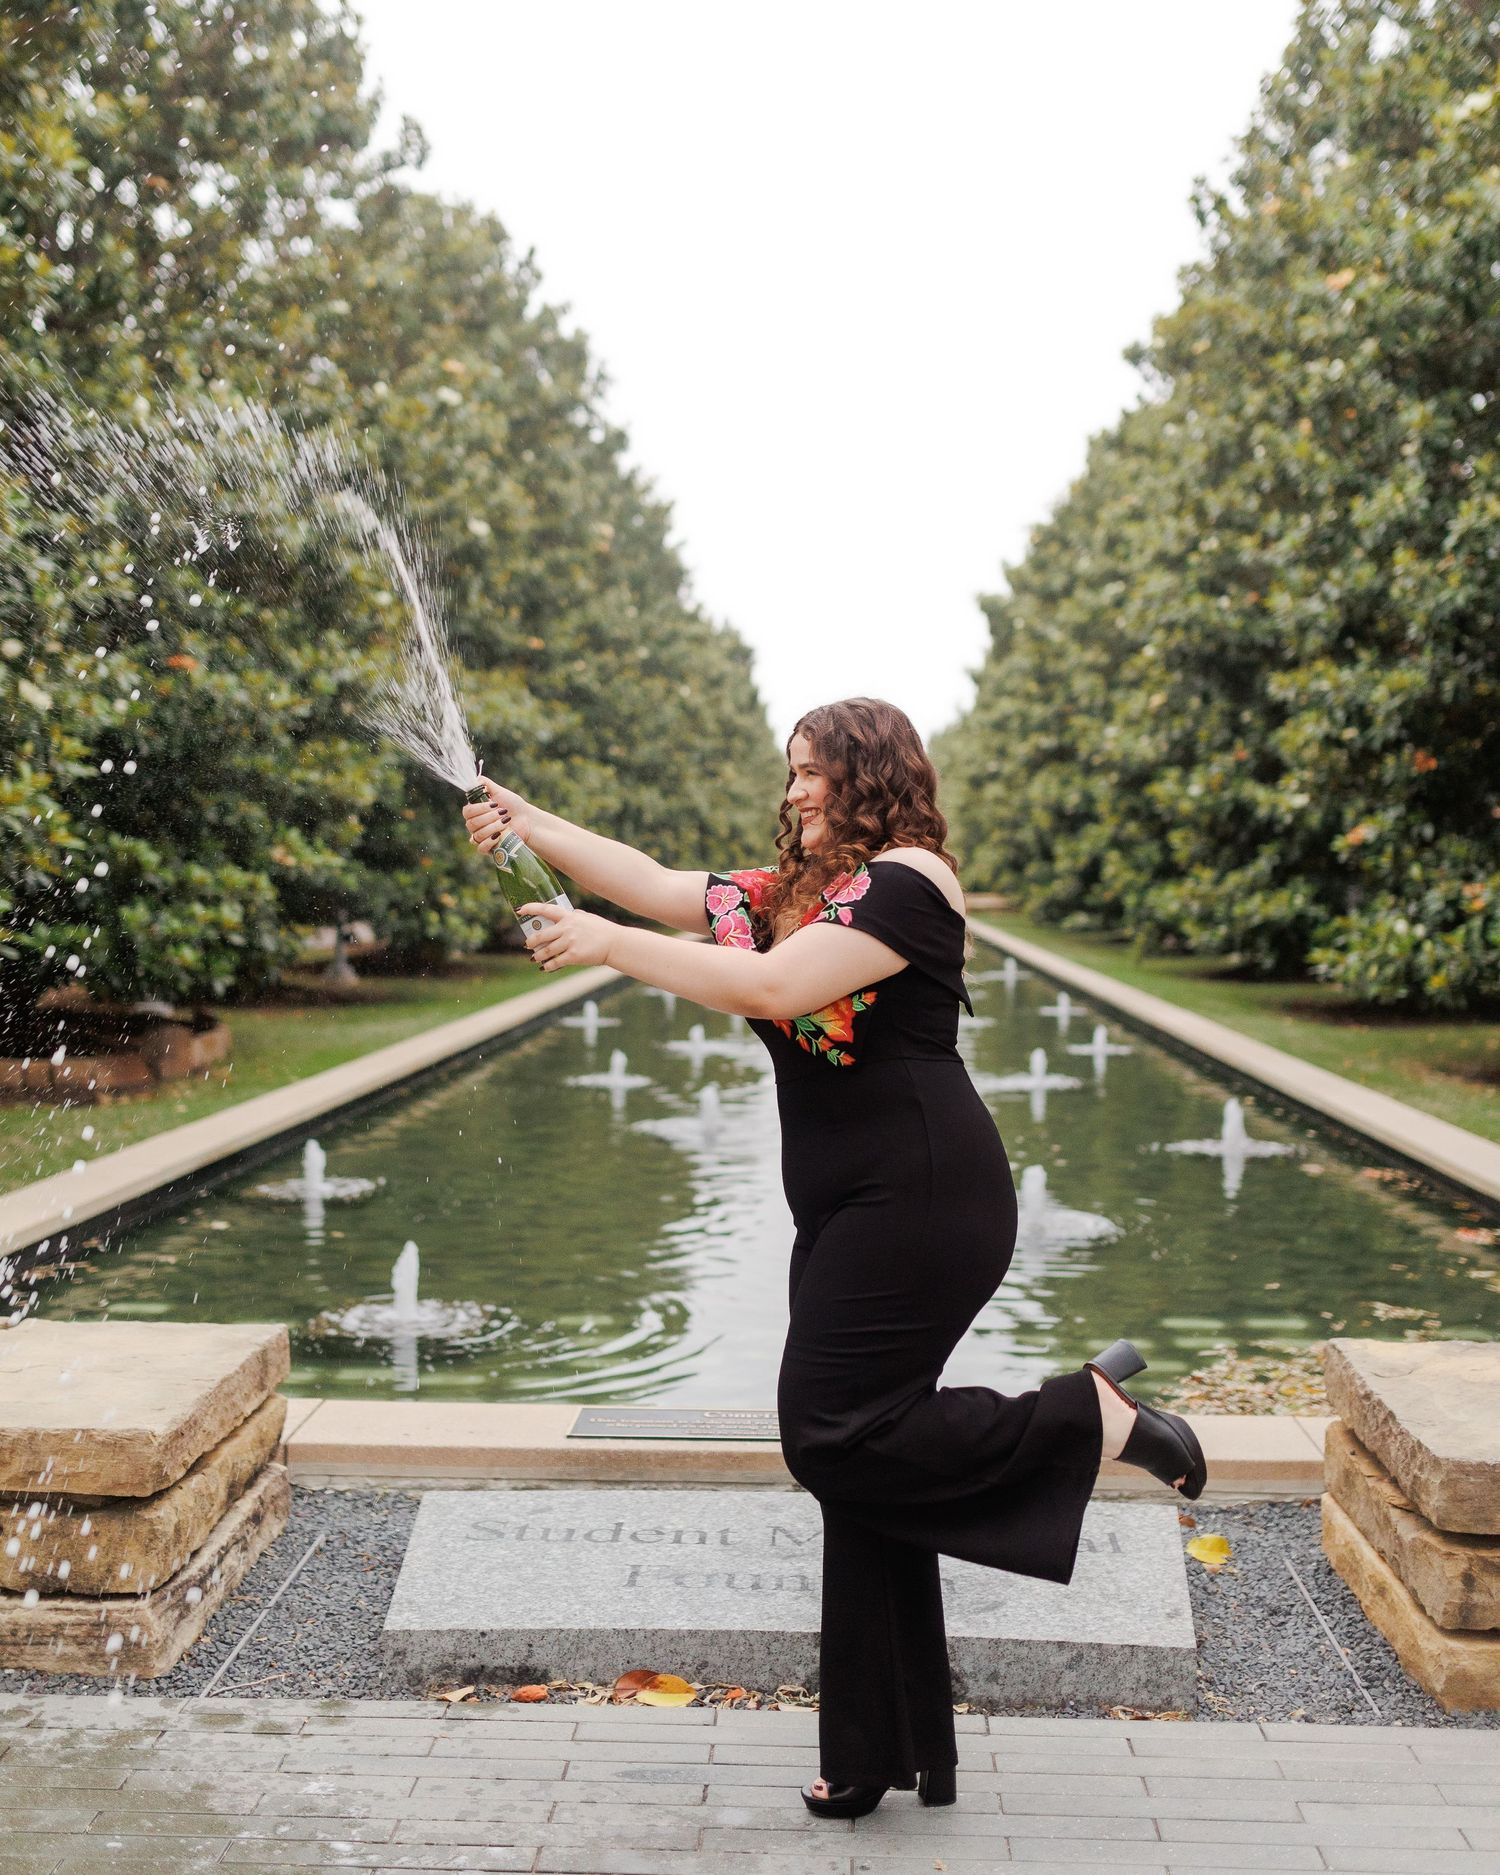
Think of this as a combination of multiple items - both using a prop and using a pose that creates angles that looks flattering. A champagne pop is super common in grad photos and that little *princess diaries pop* can make such a difference!
3.How can you enhance your look?
Once you've decided your style, you can now figure out how to elevate it. Using accessories like jewelry, outerwear, shoes, sunglasses, and bags - you can give yourself a more full look. If you're shooting branding or headshots you can bring a planner and a pen, a laptop or tablet, or your tools that help you operate for your business. If you're shooting a family session and you have toddlers or kids, you can bring something like books or bubbles to keep them occupied since kids function best when doing something and not just sitting still. Or for couples, think about something you like to do together or for each other - playing guitar, taking photos, painting. All of these items are props that can help you tell a story and convey the right message for your photos.
4.How do you want to show up in your photos?
Posing can be one of the more challenging things you experience, especially if it's your first time being in front of a camera, so being in front of a mirror is going to be your best way to experiment. I try to reiterate to my clients that the photos you send as your inspo photos are just that - inspiration, which makes them a good place to start! Stand in front of the mirror and practice some poses you've looked at! Do you like how it looks? What would you change? Experiment with different hand placements on yourself, use your body to create shapes and silhouettes and see if you like what you see. (If you look at the set of photos above, you can see that in each of the photos, you can see right angles and triangles being created in these simple poses). Practice different facial expressions - happy, laughing, serious, sultry - you might not be making some of these faces during your session but this will get you comfortable with moving your face and switching between expressions while shooting which will get you a wider range of photos than just a standard smile throughout. Try different angles and even micro movements that will help you subtly transition between poses. (Bonus points for trying out your poses in your outfits!)
5.Are your photos missing anything?
Think about your setting and picture the space (either in your head, on Google Maps, or from photos of the location). Now picture your outfit in that space - how does it look? Does your outfit pop? Does it fit the setting? Think about the details and props you'll be using. Is it complimenting your outfit? Is it helping you tell the story or convey the purpose? Consider all the poses and facial expressions you've practiced in the mirror. What poses look the most flattering? What poses do you feel most confident in? What expressions help you give a dynamic range in your photos? You've spent all that time considering the elements individually, it's now time to take a step back and consider the full picture and see if everything you need is there. The last thing you want happening to your is to finish shooting your session and getting the photos back and feeling dissatisfied with them, feeling like you could have done more, and wishing you had brought and added certain elements. It's better for you go overboard in the planning stages and plan ahead because we can always pair down and remove pieces, but having not enough doesn't give you anything to work with. If your outfit doesn't have accessories then it stays plain and two dimensional, but adding props that are as simple as a hat and a purse can actually help you create more than you would expect.
It's my duty to give you the most well rounded gallery possible but your session can look boring, flat, and repetitive.

I love the use of primary colors in outfits because it's a really great way to stand out if that's what you like to represent! This client used a confetti cannon as one of her props and having her pop it and walk through it helped create depth while I focused on her and the little flakes of confetti and soft and frame her in such a pretty way.

This client had the best stroke of luck because at UT Dallas there is a mist fountain, so this was all about timing. Having the mist go off created this soft, golden, glowy background. So I had my client swish the length of her skirt around to create big dramatic statement flares, which showed her off incredibly well.

This is a great example of using an existing color palette to your benefit. This client matched her dress to the color of her graduation cap, and the setting she chose had lots of neutral, muted, and natural colors. It allowed her to stand out and really show up in a way that says "I'm here! I graduated!".

Here you'll see my client chose an olive green dress and the location we ended up shooting at was a last minute switch due to the original location being too busy. This location definitely created a lot of monochromatic vibes for her because of the way the greens blended in with her dress. But after editing these, I think the monochromatic vibes totally complemented her personality.
As the photographer, it's my duty to give you the most well rounded gallery possible but it means that you need to do your part in the collaborative process. You want to have all your outfits at least a week before shooting your session, and experiment with them in order to know exactly what the vision is. You want to be able to create photos that help tell the story of yourself, your business, your love, or even your growing family. Every session has a story to tell and I want to help you find it through the photos I'm taking. You don't have to be an experienced model or have tons of experience in front of the camera to have a good session. I hope these questions are helpful when thinking about planning your session! I know there's a lot more pieces of advice I have to offer but I'll save them for future posts. These 5 questions are the building blocks to planning and styling your session, and to my clients that have booked with me, you might be reading this as a guide to help fill out that questionnaire. That's why these posts are important to me! It helps me put the right messaging out there that I can send to my clients universally that may help answer questions that you might have. I can't wait to share more soon!
XOXO,
MATHILDA